#include <LiquidCrystal_I2C.h>
#include <Wire.h>
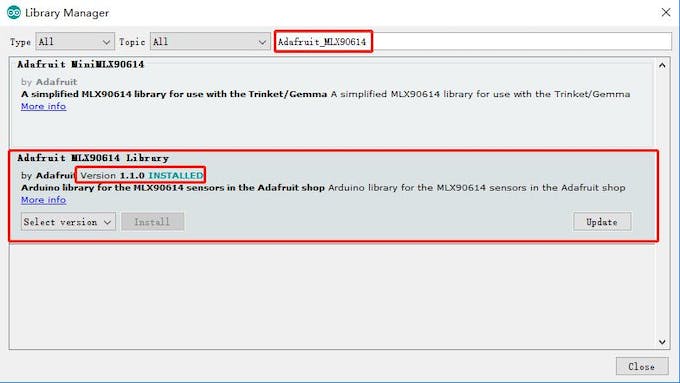
#include <Adafruit_MLX90614.h>
#include <EEPROM.h>
#include "MAX30105.h" //sparkfun MAX3010X library
MAX30105 particleSensor;
LiquidCrystal_I2C lcd(0x27,20,4);
//#define MAX30105 //if you have Sparkfun's MAX30105 breakout board , try #define MAX30105
Adafruit_MLX90614 mlx = Adafruit_MLX90614();

double avered = 0; double aveir = 0;
double sumirrms = 0;
double sumredrms = 0;
int i = 0;
int Num = 100;//calculate SpO2 by this sampling interval
int Temperature;
int temp;
float ESpO2;//initial value of estimated SpO2
float ESpO2_ROM;
double FSpO2 = 0.7; //filter factor for estimated SpO2
double frate = 0.95; //low pass filter for IR/red LED value to eliminate AC component
#define TIMETOBOOT 3000 // wait for this time(msec) to output SpO2
#define SCALE 88.0 //adjust to display heart beat and SpO2 in the same scale
#define SAMPLING 5 //if you want to see heart beat more precisely , set SAMPLING to 1
#define FINGER_ON 30000 // if red signal is lower than this , it indicates your finger is not on the sensor
#define USEFIFO
#define Greenled 8
#define Redled 9
void setup()
{
  Serial.begin(115200);

  lcd.init();
  lcd.backlight();
  lcd.setCursor(3,1);
  lcd.print("Running......");
  delay(3000);
  lcd.clear();
  ESpO2 = readEEPROM();
  Temperature = EEPROM.read(6);
  pinMode(Greenled,OUTPUT);
  pinMode(Redled,OUTPUT);
  digitalWrite(Greenled,LOW);
  digitalWrite(Redled,LOW);
  // Initialize sensor
  while (!particleSensor.begin(Wire, I2C_SPEED_FAST)) //Use default I2C port, 400kHz speed
  {
    Serial.println("MAX30102 was not found. Please check wiring/power/solder jumper at MH-ET LIVE MAX30102 board. ");
    //while (1);
  }

  //Setup to sense a nice looking saw tooth on the plotter
  byte ledBrightness = 0x7F; //Options: 0=Off to 255=50mA
  byte sampleAverage = 4; //Options: 1, 2, 4, 8, 16, 32
  byte ledMode = 2; //Options: 1 = Red only, 2 = Red + IR, 3 = Red + IR + Green
  //Options: 1 = IR only, 2 = Red + IR on MH-ET LIVE MAX30102 board
  int sampleRate = 200; //Options: 50, 100, 200, 400, 800, 1000, 1600, 3200
  int pulseWidth = 411; //Options: 69, 118, 215, 411
  int adcRange = 16384; //Options: 2048, 4096, 8192, 16384
  // Set up the wanted parameters
  particleSensor.setup(ledBrightness, sampleAverage, ledMode, sampleRate, pulseWidth, adcRange); //Configure sensor with these settings

  particleSensor.enableDIETEMPRDY();
  mlx.begin();
}

void loop()
{

  uint32_t ir, red , green;
  double fred, fir;
  double SpO2 = 0; //raw SpO2 before low pass filtered

#ifdef USEFIFO
  particleSensor.check(); //Check the sensor, read up to 3 samples

  while (particleSensor.available()) {//do we have new data
#ifdef MAX30105
   red = particleSensor.getFIFORed(); //Sparkfun's MAX30105
    ir = particleSensor.getFIFOIR();  //Sparkfun's MAX30105
#else
    red = particleSensor.getFIFOIR(); //why getFOFOIR output Red data by MAX30102 on MH-ET LIVE breakout board
    ir = particleSensor.getFIFORed(); //why getFIFORed output IR data by MAX30102 on MH-ET LIVE breakout board
#endif


    i++;
    fred = (double)red;
    fir = (double)ir;
    avered = avered * frate + (double)red * (1.0 - frate);//average red level by low pass filter
    aveir = aveir * frate + (double)ir * (1.0 - frate); //average IR level by low pass filter
    sumredrms += (fred - avered) * (fred - avered); //square sum of alternate component of red level
    sumirrms += (fir - aveir) * (fir - aveir);//square sum of alternate component of IR level
    if ((i % SAMPLING) == 0) {//slow down graph plotting speed for arduino Serial plotter by thin out
      if ( millis() > TIMETOBOOT) {
        float ir_forGraph = (2.0 * fir - aveir) / aveir * SCALE;
        float red_forGraph = (2.0 * fred - avered) / avered * SCALE;
        //trancation for Serial plotter's autoscaling
        if ( ir_forGraph > 100.0) ir_forGraph = 100.0;
        if ( ir_forGraph < 80.0) ir_forGraph = 80.0;
        if ( red_forGraph > 100.0 ) red_forGraph = 100.0;
        if ( red_forGraph < 80.0 ) red_forGraph = 80.0;
        //        Serial.print(red); Serial.print(","); Serial.print(ir);Serial.print(".");
        float temperature = particleSensor.readTemperatureF();

        if (ir < FINGER_ON){
        temp = Temperature;
        EEPROM.write(6,temp);
        ESpO2_ROM = ESpO2;
        writeEEPROM(&ESpO2_ROM);
        lcd.setCursor(0,2);
        lcd.print("Last test: ");
        lcd.setCursor(11,2);
        lcd.print(ESpO2_ROM);
        lcd.print(" ");
        lcd.print("% ");

        lcd.setCursor(0,3);
        lcd.print("Last temp: ");
        lcd.setCursor(11,3);
        lcd.print(temp);
        lcd.print(" ");
        lcd.print("*C");

        break;
        }
        if(ir > FINGER_ON){
        Temperature = mlx.readObjectTempC();
        lcd.setCursor(0,0);
        lcd.print("Oxygen % = ");
        lcd.setCursor(11,0);
        lcd.print(ESpO2);
        lcd.print(" ");
        lcd.print("% ");
       // Temperature = Temperature+2;
        lcd.setCursor(0,1);
        lcd.print("Temperature: ");
        lcd.print(Temperature);
        lcd.print(" *C");
        if((ESpO2 >= 90) && (Temperature < 38)){
          digitalWrite(Redled,LOW);
          digitalWrite(Greenled,HIGH);
        }
        if((ESpO2 < 90) || (Temperature > 37)){
          digitalWrite(Greenled,LOW);
          digitalWrite(Redled,HIGH);

        }

        }

      }
    }
    if ((i % Num) == 0) {
      double R = (sqrt(sumredrms) / avered) / (sqrt(sumirrms) / aveir);
      // Serial.println(R);
      SpO2 = -23.3 * (R - 0.4) + 100; //http://ww1.microchip.com/downloads/jp/AppNotes/00001525B_JP.pdf
      ESpO2 = FSpO2 * ESpO2 + (1.0 - FSpO2) * SpO2;//low pass filter
      //  Serial.print(SpO2);Serial.print(",");Serial.println(ESpO2);
      sumredrms = 0.0; sumirrms = 0.0; i = 0;
      break;
    }
    particleSensor.nextSample(); //We're finished with this sample so move to next sample
   // Serial.println(SpO2);
  }
#endif
}

void writeEEPROM(float *data)
{
 byte ByteArray[4];
 memcpy(ByteArray, data, 4);
 for(int x = 0; x < 4; x++)
 {
   EEPROM.write(x, ByteArray[x]);
 }

}

float readEEPROM()
{
  float ESpO2 = 85.0;
  byte ByteArray[4];
  for(int x = 0; x < 4; x++)
  {
   ByteArray[x] = EEPROM.read(x);
  }
  memcpy(&ESpO2, ByteArray, 4);
  return ESpO2;
}


